Tag your projects with text and colors to sort them more easily within your library. Use tags to prioritize your projects, sort them by team users, arrange them by tasks to be carried out, etc.
This article provides information on:
Create a new tag
- Click on the Tag icon in the navigation bar of the library.
- Click on Create a tag.
- Type in a name, select one of the twelve available colors and click on Create tag.
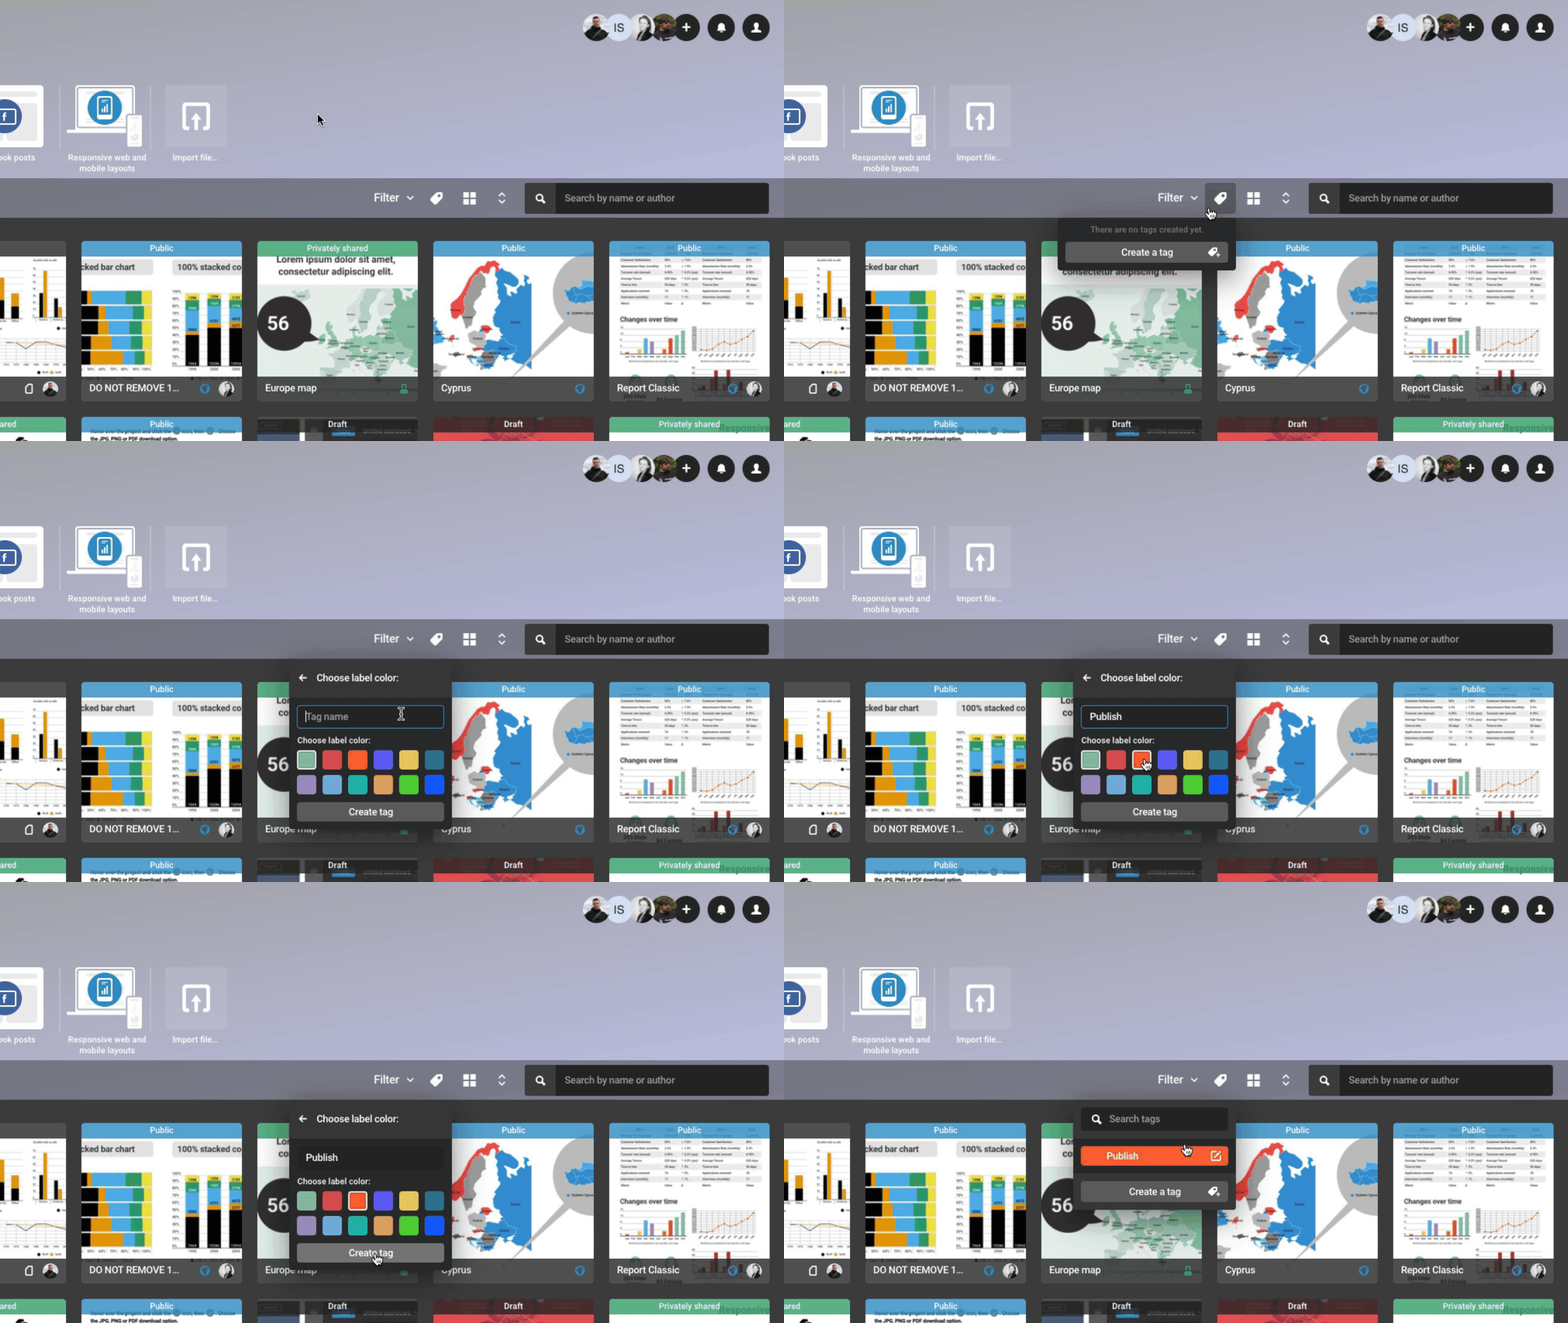
It is also possible to create a new tag by selecting the Create a tag option when hovering over a project and clicking on the Tag icon.
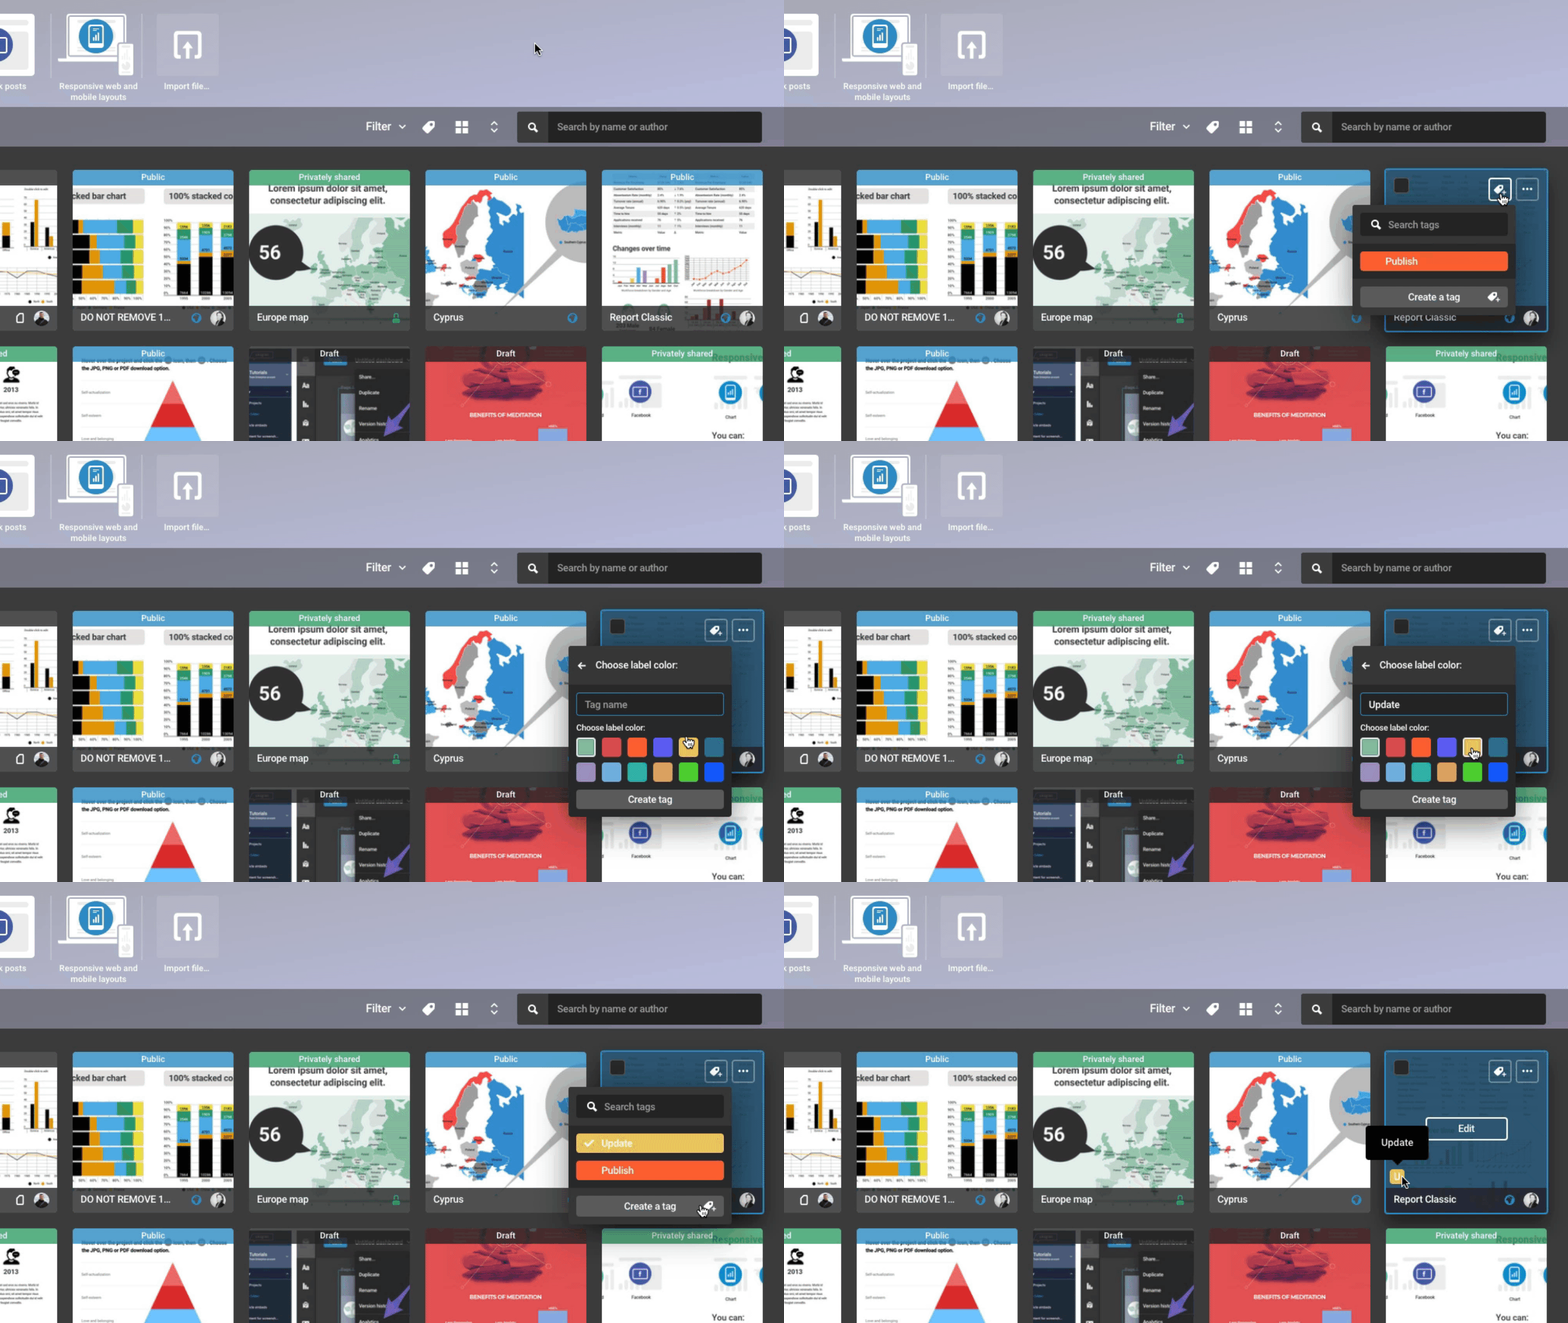
Add a tag to your project
- Hover over a project and click on the Tag icon.
- Click on the tag that you want to add to the project or create a new one. You can use the search bar to search for specific tags.
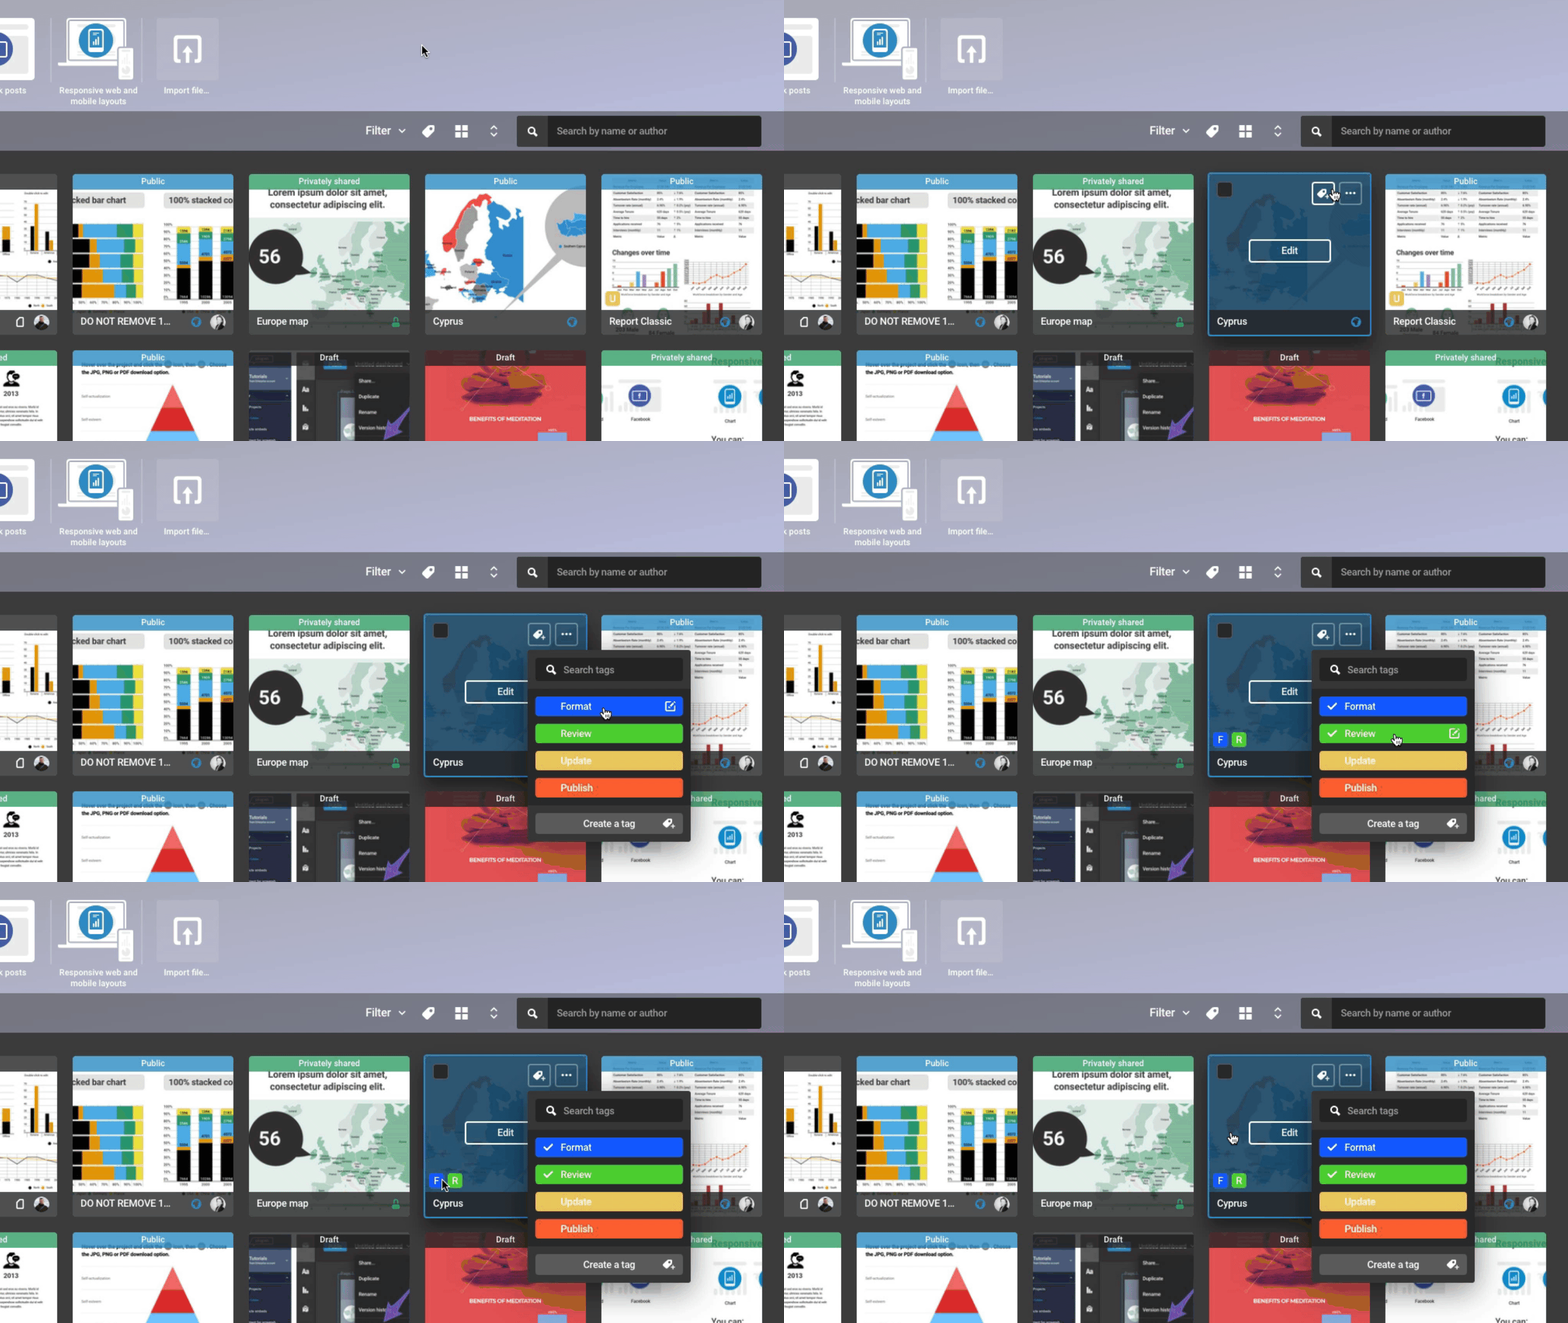
Edit existing tags
- Click on the Tag icon in the navigation bar of the library.
- Hover over the tag that you want to change and click on the Edit icon.
- Make the changes by editing the text and/or selecting a different color, then click Save.
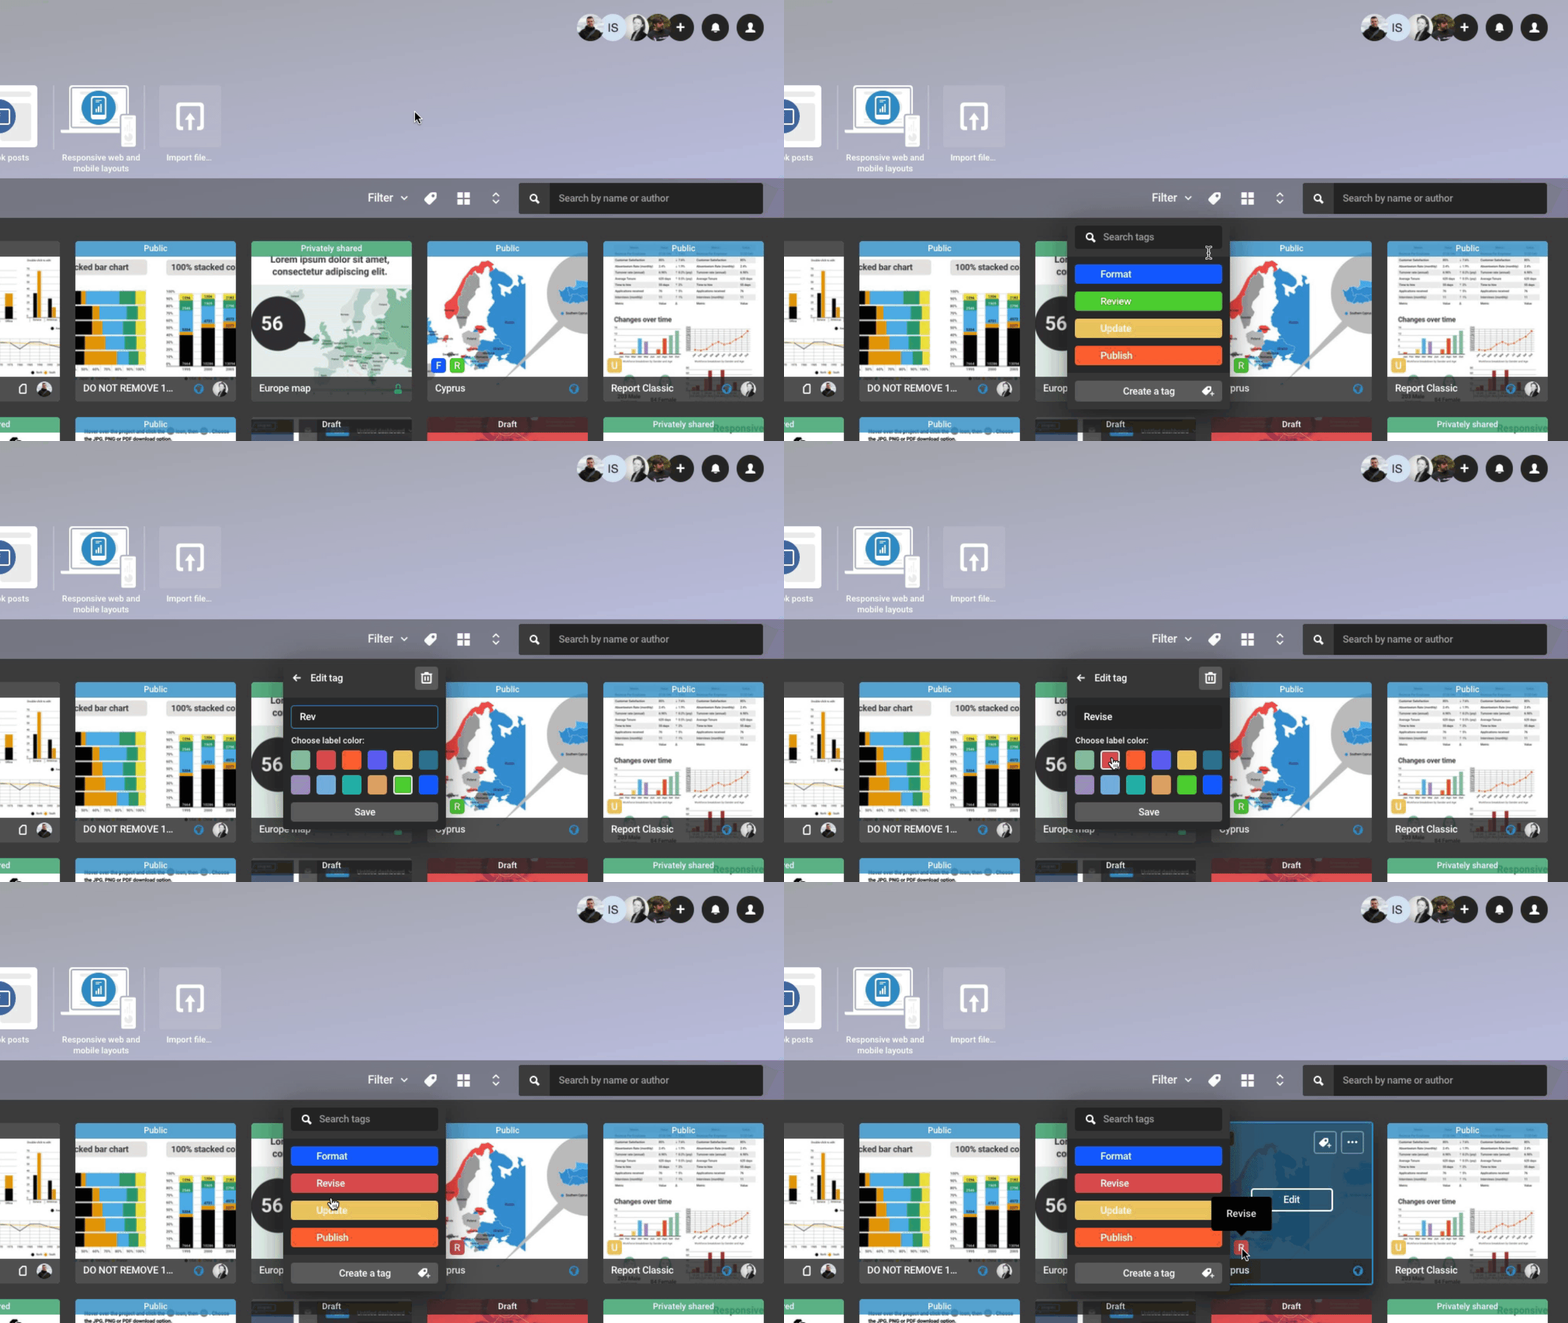
You can also edit existing tags when picking a tag for one of your projects.
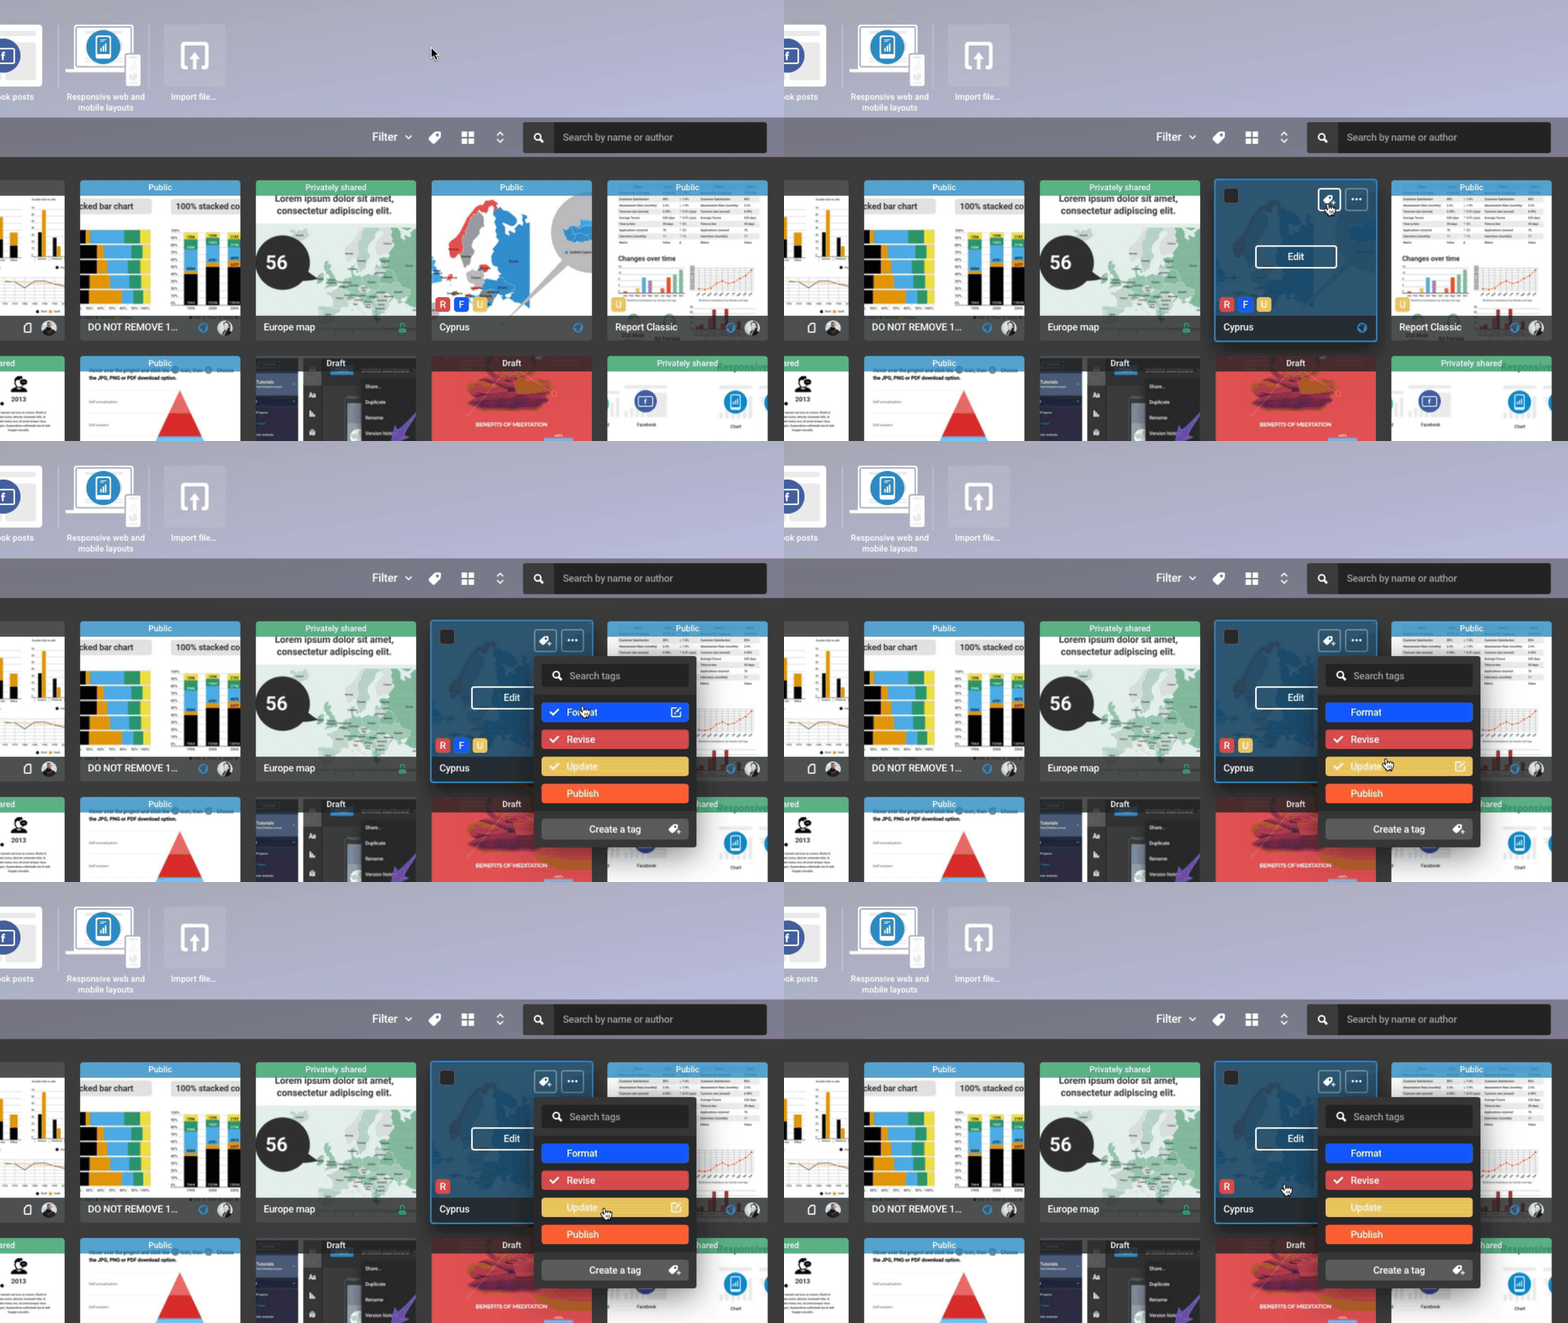
Remove tags from projects
- Hover over a project and click on the Tag icon.
- Scroll through the list of tags and uncheck the tags that you want to remove by clicking on them.
Delete tags
- Click on the Tag icon in the navigation bar of the library.
- Hover over a tag and click on the Edit icon.
- Click on the Trash icon and the tag will be deleted.
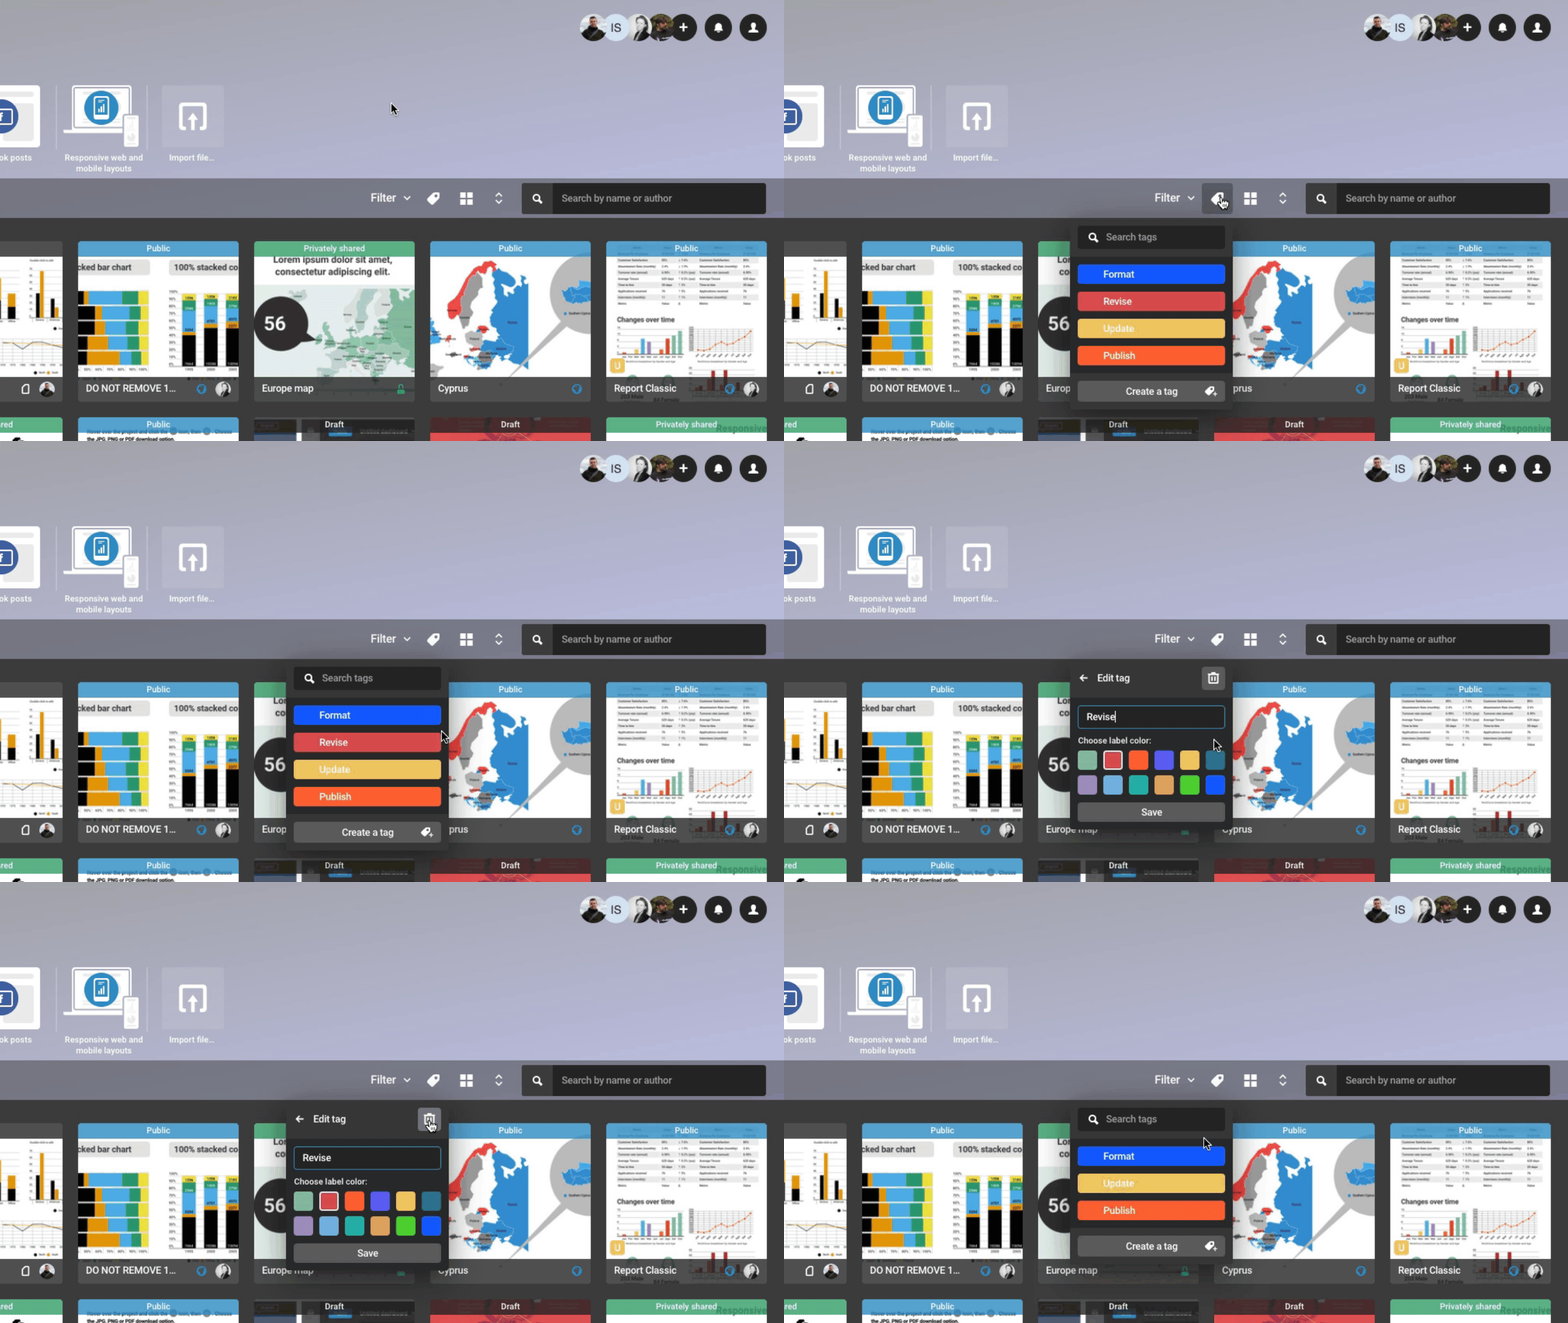
It is also possible to delete tags when picking a tag for one of your projects.
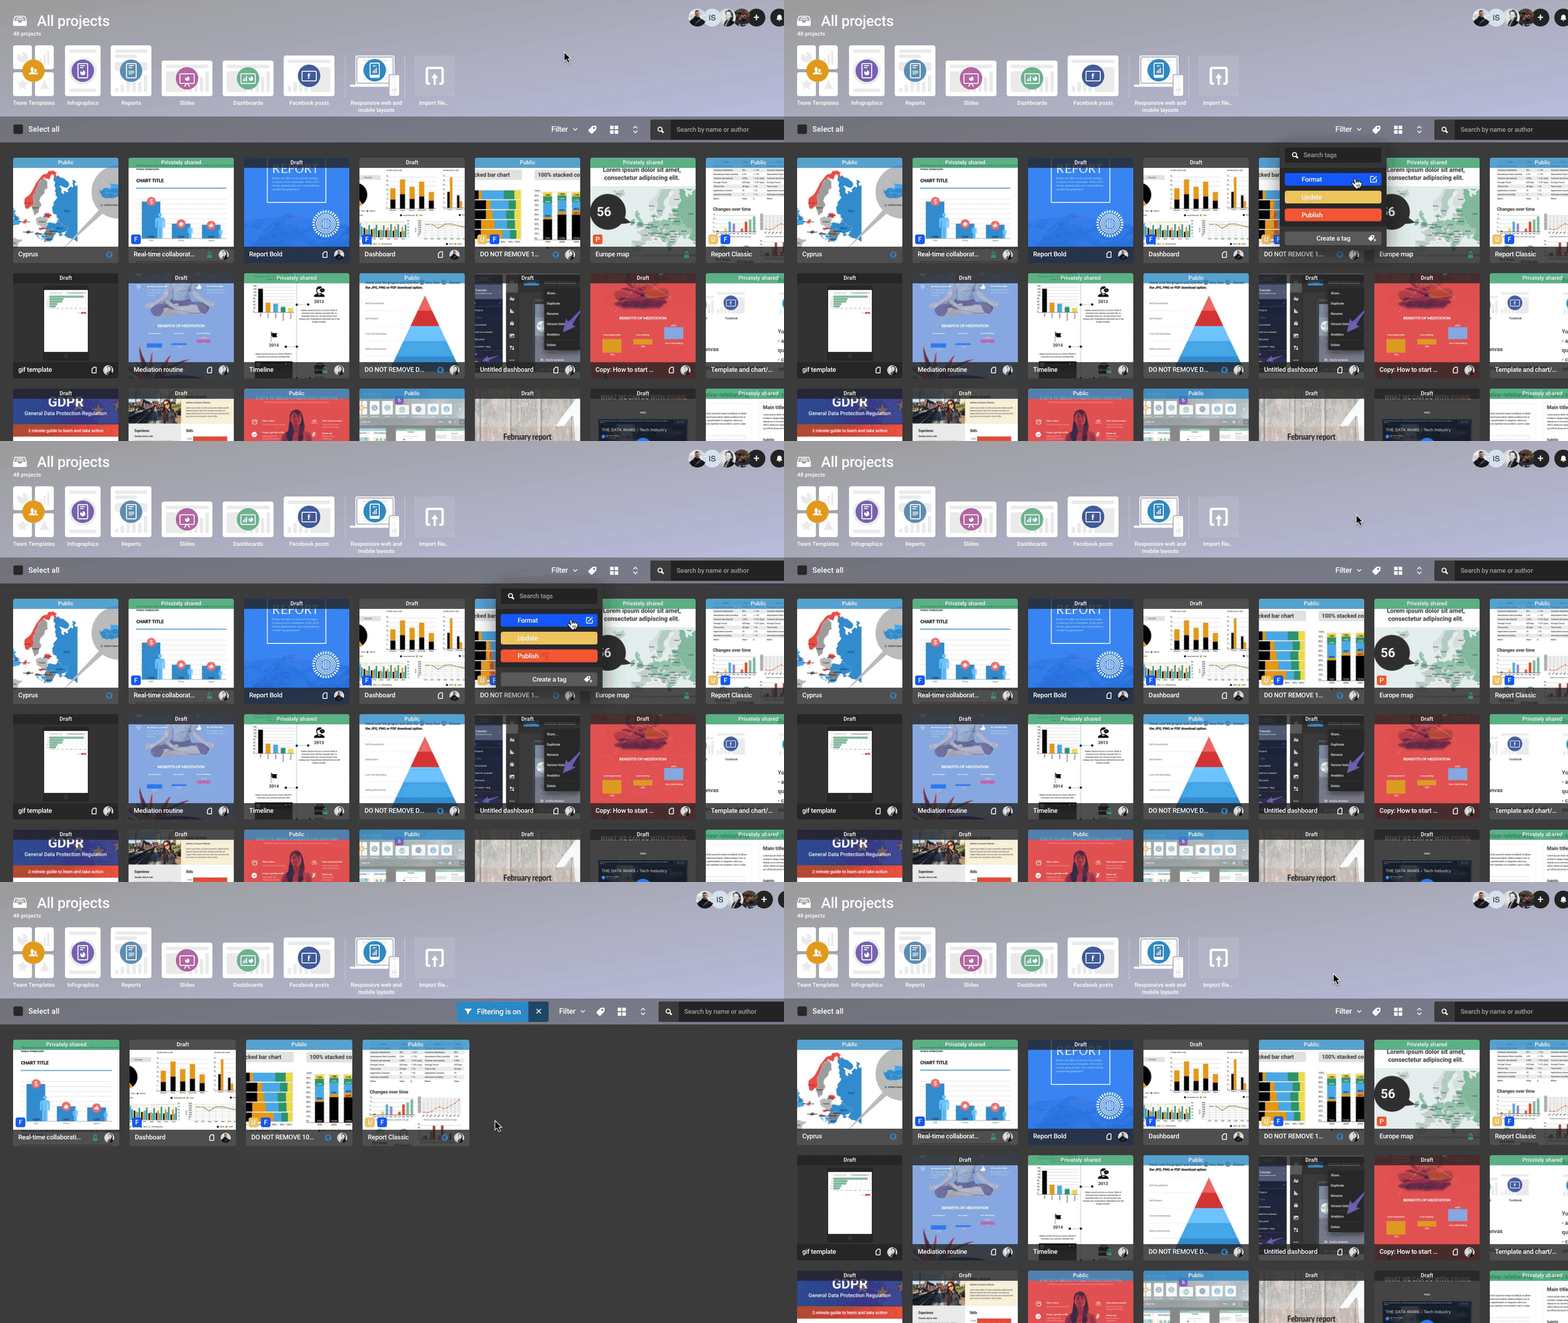
Sort projects by tags
- Click on the Tag icon in the navigation bar of the library and click on the tags that you want to be displayed.
- You can also sort projects by clicking on the tags displayed on the project thumbnails.
 Note: Tags are team-specific and cannot be transferred between different team libraries. When moving/copying projects between libraries, the tags do not remain intact.